How to Build a Bathroom Cabinet
The bathroom remodel on my main floor is going smoothly, but I now need more storage for linens and a broom closet. I am going to build a bathroom cabinet to add more storage and functionality to the area!
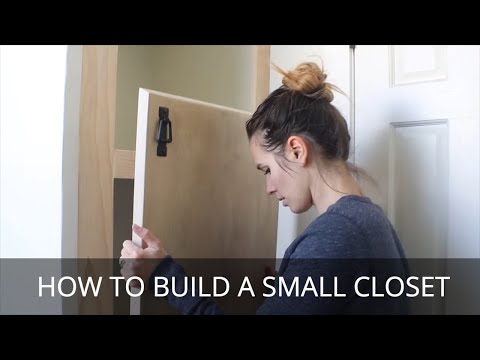
Table of Contents
- Prepping the Wood
- Adding Framing to the Cabinet
- Drywalling
- Building the Inside of the Cabinet
- Adding a Shelf
- Priming and Painting
- Building a Cabinet Door
- Sanding and Staining
- Assembling the Face Frame
- Installing the Face Frame
- Finishing Up!
Preparing the Wood to Build a Bathroom Cabinet
This project is not going to cost me all that much money because I am using a lot of leftover materials. I am going to drill some kreg jig holes into the framing. These are the center supports for the entire cabinet. Then, I am going to connect them all together, forcing them against my cement driveway so that everything lines up. The middle support piece is exactly 4-feet up the wall, I did typical measurements for framing. As I was framing this up I kept checking my square to make sure everything lined up nicely.


I am going to be framing up a wall on one side to determine the depth and width of this cabinet. It will look like it is meant to be in the corner of the bathroom, not added later. It is going to be about 22 inches deep and 21 inches wide. Because of this, I am adding a second stud because studs are supposed to run every 16 inches to support the drywall.
Adding the Framing to the Bathroom Cabinet
Bringing the framing of the cabinet into the bathroom was not easy. Learning how to build a bathroo cabinet has been harder than anticipated! It is a small space, so it was a little difficult. The frame was a tight fit, so I hammered it into place. I am screwing the framing for the wall I am adding to the existing wall framing. For the floor, I am also screwing it in.


Drywalling the Bathroom Cabinet
Once the framing is in, I am replacing the drywall. I am using a combination of drywall that I took down and leftover scraps from other drywall projects I have done. I had just enough to get both the new wall and the little sidewall next to the doorway covered. Next, I have to tape and mud the drywall. This is my least favorite part, every time I do drywall I swear I am going to hire it out but then end up doing it myself!


Building the Inside of the Cabinet
For the inside of the closet, I am using plywood instead of drywall. The plywood was such a tight fit when I tried to put one full sheet in, I realize I have to cut it into two smaller pieces. I cut the two pieces of wood where the shelf will be to cover the seam. Once it is cut properly, I am screwing the plywood into place. For the side walls of the closet, I sliced down 1/2-inch thick plywood. I am nailing these into place. I only screwed the back plywood in so there would be added support for the shelf.


Building and Installing the Shelf
Once the inside of the closet is complete, I am going to drill pocket holes into the piece of plywood that will be my shelf. This piece of plywood is 3/4-inch thick and sanded on both sides. I am pre-drilling a couple of holes into the plywood. These will go into the back of the closet, a couple into the sides, and a few in the front that will go into the face frame. I knocked the piece of plywood into place inside the closet and got it as level as I could. This shelf is not covered with an edge band because it will be covered with the face frame. I cut a smaller second shelf to go above the first shelf. The edge is covered with an edge band because the face frame will not cover it.

Priming and Painting
Once my shelves were in place it was time to prime and paint. I am using a 4-inch mini foam roller to prime the inside of the cabinet. I did not use a paintbrush in the seams because I was not doing a super precise job of priming. When the primer is fully dry I am going in with 220-grit sandpaper wrapped around a little 2×4 block. I did this to sand everything smooth before going in with my paint. Then, I wiped any sawdust or residue off with a damp rag.
Before I can paint I need to fix the gaps in the ceiling. I cut little strips of pine and primed them, then used a heavy-duty adhesive to adhere them to the ceiling. Once those were in place and the adhesive was dry I could go in with caulk. When the caulk dries it will finally be time for paint.

Time to paint! I started by using a polyester bristle brush in all of the seams first to prevent drips. Then, I am going in with a big roller and rolling paint all over the inside of the cabinet. I chose to use the same color inside the cabinet that I used on the walls of the bathroom.

Building the Exterior Door for the Cabinet
I am using 3/4-inch. plywood for the doors as well, I am ripping it on my table saw so the edges are a 30-degree bevel. It was my assumption that this detail would make them look prettier. I am going to rip the other side in the other direction to get a bevel on every side.


To create the face frame of the closet I am using select pine. I ripped some of them thinner, the side that is covering the framed wall is kept at 3 1/2 inches wide whereas the other ones are 2 1/4 inches wide. I drilled a bunch of pocket holes, used my clamps to hold everything in place, then added screws to hold the frame together. Because the door is made of plywood, the beveled edge looks kind of ugly. I am using Pure Edge edge banding to cover it. This irons on very quickly and looks much better.


Sanding and Staining
Once the glue from the edge banding is dry, it is time to sand. This sanding took hours! I sanded the face frame, the doors, and every edge. I am sanding the edges so that they would be a little bit softer to the touch. Once everything is sanded I am wiping it off with a cloth and putting polyurethane on it. This is being applied with a fine polyester bristle brush. I love the color that came out with just one coat of polyurethane on the face frame, but when I put it on the doors it did not look as good. I am mixing up a custom wash for the doors and painting it on. It looks so much better.


Assembling the Face of the Bathroom Cabinet
To assemble this cabinet I am beginning on the horizontal space of my floor. This is going to make it so much easier to get things lined up and pre-drilled. I am lining up where I want my hinges to be and set the doors on top of them. Once everything is in place, I use a pencil to mark where I need to pre-drill. The hinges I am using match the ones that are on the vanity in the bathroom. I am adding a little piece of wood behind every hinge to make it conducive to the space.

Installing the Face Frame
The first thing I am doing is clamping the frame into place. Once it is clamped into place I am screwing directly into the wall stud. Then, I am adding in more screws where I pre-drilled. For the edge of the cabinet, I am taking 1-1/2 inch by 1-1/2 inch wooden outside corner trim piece and nailing that into place. This ended up being perfectly flush with the wall and it looked so good! In order to fill all of my holes I am using drywall joint compound and wood filler. To the face frame off I am sanding, adding another layer of polyurethane, and caulking.


Hanging the Doors
Once I have installed the hardware on the door it is time to hang them on the face frame. To hang the doors I am lining them up with the face frame and putting tiny little screws through the hinges. I pre-drilled holes into the face frame so I would know exactly where to put the hinges. To add more storage space I am hanging a hook on the inside of this cabinet!


I love how this closet turned out! It has added so much storage and versatility to this small bathroom!


