DIY Treehouse Build
Ever since we moved into our house five years ago, I have admired the huge maple tree in our backyard. It is perfect for climbing and my children regularly scale it. I figured it was about time that I built a DIY treehouse!
This post may contain affiliate links or sponsored content. For full disclosures and practices, please visit my policy page.
Table of Contents
- Planning
- Building the Platforms
- Connecting the Platforms to the Tree
- Decking the Platforms
- Staining and Sealing
- Safety
- Adding Play Equipment
DIY Treehouse Planning
This treehouse has been a long time coming, but I have not started because I have been intimidated by how large this project is. The entire build is custom, you have to build around your specific tree, so I was not certain how to go about it. I thought about the design for months before building. I finally landed on a design that combines treehouse with playground so we can get rid of the Rainbow play set we had in our yard.


Building the Platforms
To begin my build I am using TuffBlocks, I am using as footings. A lot of playgrounds are built where the 4×4 just sits on the ground, but I want more stability for my structure because it is going to have four levels. I’m building with green-treated lumber so it lasts in the elements. I didn’t really measure anything ahead of time because I was just building around the tree. It was a lot of hold in place, see how it looks, then mark and cut! Every single one of these platforms has at least one board angled to build around the branches of the tree. I connected the 2×6 joists every 16 inches apart using leg screws. I used this hardware instead of joist hangers because none of the platforms span beyond 6 feet.


Connecting the DIY Treehouse to the Tree
With the TuffBlocks installed level to each other, I am putting the 4×4 legs of the first platform into them and standing it up next to the tree. Then I level the platform and screw the other side into the tree with 4 inch lag screws. I tried not to put too many screws into the tree while still making sure the platforms were secure. To install the 7.5′ tall platform on the third level I pushed it into place using a long 2×4.


Decking the Platforms
I got 5/4 treated decking and am laying it all in place on my platforms that are connected to the tree. I use a pencil to mark off where I am going to cut my boards on my miter saw. Before I take the boards to my saw I am making sure to order them with numbers so I do not get them mixed up. After they are cut it was so satisfying to lay them into place!

Staining and Sealing
Once all of my platforms are built and installed, it is time for staining and sealing. In order to stain and seal the wood has to be dry enough, so I picked up a moisture meter. For treated lumber the moisture has to be under 15%. Once my lumber is dry enough I use my orbital sander to smooth out the wood. This is especially important in the places where my kids are going to be touching the most.


After four hours of sanding it is time to stain, I am using a Wagner Airless Sprayer. I am mixing my stain and sealer in one product. The entire treehouse is being sprayed with stain. I am still back brushing to work the stain into the pores of the wood. When the stain is dry I am attaching the ladder to its platform. I am then going over my platforms with my sander, so it is soft to walk on and ready for more stain. The sprayer I am using for the tops of the platforms is a battery-powered sprayer to stain the platforms!


DIY Treehouse Safety
After the stain had dried for a couple of days it was time to install my railing kit. I cut 2x4s to the width that they needed to be and used snap and lock balusters to put everything into place. Once the 2x4s are in place I am putting my square metal spindles into place. There is one area on the second platform that I do not feel is completely safe, but I can not add a railing. My solution to this issue is to use a net hammock and securing it in the gap.


Adding Equipment to the DIY Treehouse
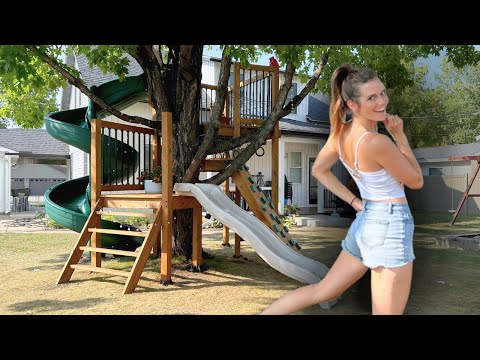
To the first platform, I am adding a small slide that I got for free from Facebook Marketplace. On the highest platform, I am adding the big spiral slide! This slide required me to recruit some help in installing it because it is so big. For the rock climbing wall I screwed in the holds at equally spaced out places on the wall. I attached my 2×6 supports at an angle to the platform then screwed my rock climbing wall into said supports. Underneath the tall third platform I am using leg screws to secure metal swing hangers for some gymnastic rings for monkey bars. Next to the monkey bars, I am hanging another metal swing hanger that will hold a disc swing.


My kids have loved to play on this treehouse, and I love that it is a space they can share with all of their friends!

If you want to check out more of my outdoor projects, my blog post Build a Retaining Wall in One Day is a great place to start!
