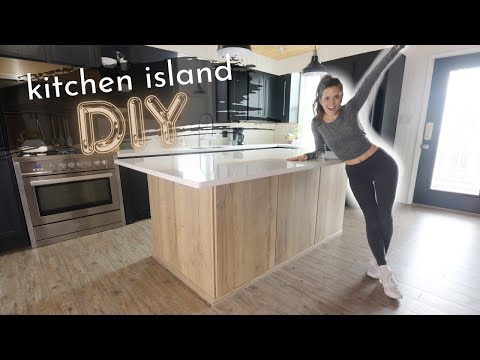
DIY Kitchen Island Build
I created my old kitchen island from a lawyers desk and it was time for an upgrade, so I am doing a DIY kitchen island build! Because of this, I am able to customize everything to maximize storage and space.
This post may contain affiliate links or sponsored content. For full disclosures and practices, please visit my policy page.
Table of Contents
- What does this Island Contain??
- Working with Red Oak
- Installing Drawer Slides
- Building the Base of the Kitchen Island
- Mistakes I Made
- Installing the Cabinets
- Adding the Countertop
- Adding Hidden Storage
- Final Touches
- Features of the Kitchen Island and the Final Product
Makeup of the Kitchen Island
For this DIY kitchen island I built six cabinets. Three rather shallow ones with shelving to go on the back side, two drawer stacks, and one that will house a microwave. While all six of these drawers turned out great, this project was not without struggle!


Working with Red Oak
The biggest learning curve in this project came from working with oak for the first time. Cutting red oak required me to buy two new blades and is impossible to stain. I faced the difficult challenge of matching the finish of my red oak trim and face frames to pre-made doors and drawer fronts. To neutralize the red oak’s pink undertones I tried dozens of stain combinations. I finally landed on a custom mix that I concocted. I added green which neutralized the red and I finally got the stain finish that I am going for.


Drawer Slide Installation on the DIY Kitchen Island
Once I have everything stained, it is time to install the drawer slides on my finished cabinet boxes. I made the boxes flush with the inside of the face frame so I do not have to build up any blocking to install my under-mount slides. The slides I am using are 21-inch BLUM Tandem plus Blumotion full extension soft close slides. I am going to flip my cabinet on its side to place these perfectly. I measured to make sure they were level, predrilled, and screwed them in! It is important to inset the slide at least 1/8 of an inch so your drawer closes tightly. I have to use blocking on the drawer below the microwave because the box was a lot wider to accommodate the microwave that would be situated above.

Build the Kitchen Island Base
I am beginning to build the base for the DIY kitchen island by laying my two-by-fours flat because I want as minimal space wasted as possible. Using a base will make leveling the island easier and will make securing it to the floor easier. I am making this island as big as I can while accounting for standard walking path dimensions. The floor in my kitchen is very unlevel because the foundation under this kitchen is more than 130 years old. I am using scrap plywood and shims to level my base. It is being screwed it in through the floor with a screw long enough that it hits the subfloor. My flooring is glue-down luxury vinyl plank, if it was a click-together floating floor I would have had to remove it. If you want to know how I installed this flooring click here! Using a base is a time saver as it prevents you from having to level each cabinet individually.


Once my base is in place I am putting all of the boxes on top! With the boxes in place, I am calling in my electrician to wire in an outlet for the outside panel and inside the cabinet for my microwave!

Mistakes in the DIY Kitchen Island Build
Once everything was in place I realized my mistakes. The microwave’s width is 23.5 inches and I thought I had made my face frame below the same width, but I messed up somewhere because it has a 1/8-inch gap on both sides. My dry fit also produced the glaring problem of requiring taller trim for the raised end of the island base. Shimming it 1/2-inch high meant I needed a 2-inch tall trim, not the 1.5-inch tall oak trim I had already cut, sanded, stained, and sealed. I am a perfectionist and decided to make it all new.


Installation of the Cabinets
Now that all of my mistakes have been corrected and everything is built I can set my cabinets. Installing these to the base is easy with pocket screws- I just replaced a few screws that I used to put together the box with longer screws that went into the two-by-four base. I am also adding blocking between each box and screwing them together. This blocking method prevented me from having to screw through my face frames to hold everything in place. Next, I put the microwave in place and plugged it in. Now I am going to cover the sides of the island with 3/4-inch thick paneling. I had to shim it to be completely flush on top and screwed it from the backside into my cabinet boxes.


Countertops for the DIY Island Build
This DIY island build is finally starting to come together! It is ready for countertops at this point. I ordered a large slab of plain white quartz counter from a local dealer. I feel as though white will be the most timeless choice for countertops. The countertops were installed by the people who delivered it!

Backside Door Installation
It is now time to install doors on the backside of the island to cover my shelving and create hidden storage. The hinges I am using are soft-close 1 1/4-inch overlay European style, so they are hidden when installed. My goal for these is that the doors look like paneling and no one knows they open. For the drawer fronts, my trick to getting the perfect spacing is carpet tape, I am going to place a strip of this heavy double-sided tape to the drawer front and then line it up and press. It is strong enough to allow me to pull my drawer out with the front placed properly without shifting. Then, I can clamp and screw the front on from behind.


Finishing Touches
I have a cabinet hardware jig that helps me perfectly place holes for the long modern black handles that I am installing. The final touch on the island is installing the base trim. My trim has to be cut at an angle so it meets a piece 1.5 inches tall on one side and 2 inches on the other. Now it is all level! After two hours of precision caulking, my island is finally done!


DIY Island Build Features
I love how the island brings a warm wood tone to my kitchen design and much more functionality. One of my favorite features in my custom kitchen island build is the microwave. It is so nice to have my microwave off my counter, but you might not have realized this one is a drawer and you access it from the top. Another feature of this island is the bamboo organizers I added to my drawers to keep things tidy. Another aspect of this island that I love are the two pull-out cutting boards. This makes meal prep so efficient. I designed the deep drawers to perfectly fit things like cereal boxes and my largest pans. The shelves that are hidden on the backside of the island have expanded my kitchen’s storage capabilities exponentially. The four receptacle outlets on the side of this DIY island bring so much more functionality to the island countertop.


Overall, having this DIY kitchen island build has transformed the usefulness and efficiency of my kitchen, a place where I spend many hours preparing food and eating with my family. If you want to see the rest of my kitchen you can read the blog post here!


If you enjoyed this post on the kitchen and want to see more projects I have done in the kitchen, my DIY small kitchen makeover is a great place to start!
