DIY Kitchen Cabinet Build
A major part of my kitchen island build was having cabinets for added storage. I built the cabinet boxes the easiest way I know how! This DIY kitchen cabinet-build is easy and creates budget-friendly and strong cabinets!
This post may contain affiliate links or sponsored content. For full disclosures and practices, please visit my policy page.
Table of Contents
- Cutting the Wood for the DIY Kitchen Cabinet Build
- Drilling Pocket Holes and Sanding the Plywood
- Cutting Wood for Face Frames
- Assembling the Cabinet Boxes
- Assembling the Face Frames
- Putting all the Pieces Together
Cutting the Wood for the DIY Kitchen Cabinet Build
It is a lot of work to build cabinets from scratch. This DIY kitchen cabinet build mostly uses a Craig jig and pocket holes. I only have a small table saw, so I am setting up a straight edge with a four-foot level to rip cross-cuts on my pieces of plywood. For cross-cuts on plywood I use painter’s tape because it is very easy to get tear out and painter’s tape laid out on your line helps to prevent that. I use my table saw as often as possible. It has an 80 tooth blade on it and it cuts the plywood very cleanly.


Drilling Pocket Holes and Sanding the Plywood
My craig jig is not sold anymore, but there are so many options for drilling pocket holes. Click here if you want to purchase one that I think is good! I am drilling so many pocket holes into these pieces to assemble my cabinet boxes. The purpose of this is so they can go together with strong joints, but my hardware is still going to be hidden. For this project, I am building six cabinet boxes!

Once all of my pocket holes are drilled, it is time to sand all of the pieces. I am using 120 grit sandpaper on my random orbital sander. This took a LONG time. I am sealing up the porous plywood on the cabinet boxes that will have shelving. To do this, I am applying water-based polyurethane. In between the three coats that I am applying, I am sanding with a high grit sandpaper then wiping off the dust and adding another coat of poly. This is going to give me a super smooth and wipable surface for the inside of my cabinets.


Cutting Wood for Face Frames
While the polyurethane is curing I am assembling face frames. On cabinets, you generally want to have face frames so you have more options for your doors. If you do not use a face frame, you have to do a full overlay. In my cabinet box design, face frames are also going to help keep the boxes nice and square. The material I am using for my face frames is a 1×4 piece of red oak that I ripped down to 1 3/4 inches wide. The rails on my face frame will also get pocket screws, this is going to make them go together so easily. I am also sanding each of these boards. I did a calculation and I spent about 12 hours sanding during this DIY cabinet build.


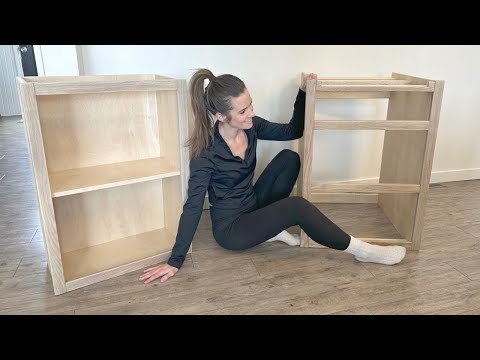
Assembling the Cabinet Boxes
The first boxes I am assembling are the ones with shelving that will be on the back of my island. This is similar to wall upper cabinets. I am using clamps to hold my pieces of plywood tightly together at exactly a 90-degree angle; this helps to keep my box square as I screw everything together through my pocket holes. The screwed-together joint is strongest when your screws are angled towards the meat of the plywood rather than towards the edge. The two shelves inside the cabinet box are also being attached with pocket holes. They are underneath, so they will not be visible. I am leveling the shelves after getting one screw into place, then I am tilting it down and securing it with the rest of the screws.


The next boxes I am assembling are the ones that will have drawers in them.The assembly for these is a little bit different than the ones with shelves. To save money, I am using stretchers rather than whole sheets of plywood. I do not need walls on these except for the two sides where the drawer slides are. I pre-assembled two scrap pieces of plywood at a 90-degree angle, this is getting screwed into the back of my cabinet. The other three corners of this box are getting stretchers that are scrap pieces of plywood. These will either be hidden by the face frame or in the back of the cabinet. This is the easiest way to put together a cabinet box that will be filled with drawers.


Assembling the Face Frames
In order to make sure that my face frames are a perfect rectangle I am using a square and clamps. I am coating my screws in wax because I heard a tip that it makes them go into hardwood better! Once my face frame is in the correct position I am putting the screws in, I put the whole face frame together with no cracking. I did not predrill the receiving wood. I just drilled slowly and carefully with my impact driver.


The vertical pieces of a face frame are called styles and the horizontal pieces are called rails. All of my pocket holes are drilled into the rails. This just simplifies things. The face frame for the box with drawers has multiple rails. Before installing my face frames onto my cabinets I am sanding all the way up to 180 grit. I also decided to pre-stain these so I do not get sloppy stain all over my boxes.

Putting All of the Pieces Together
I am applying glue to the edges of all of the plywood where the face frames are going. Next, I brush the glue across the entire edge and let it dry. I do this so the next layer can do its job properly. Once the first layer of glue is dry I am going in with another layer of glue where the face frame is going to go.


Then, I place my face frame and clamp it down. I am using 36-inch bar clamps for this. Your glue should squeeze out, you can wipe that off after assembly. It is important to glue your face frames as well as screw them in tight because face frames take the load of your doors and your hinge is reliant on the face frame. For the areas I did not pre-drill holes to pull the face frame tight, I just clamped it tight until the glue set up.


I love the way this DIY kitchen cabinet build turned out! These cabinets have added so much storage to my kitchen and helped make my vision for a new kitchen island come true.
