DIY Board and Batten Wall Treatment Without Breaking the Bank
This post may contain affiliate links or sponsored content. For full disclosures and practices, please visit my policy page.
My best friend is expecting her first baby and asked me to turn a room in her house into a nursery. I decided to install a board and batten wall treatment around the entire room to elevate the space. Here are my tips and tricks on how to do a DIY board and batten wall treatment without breaking the bank:
1. Be Sure to Install the Baseboards Perfectly Level.
- It is so important to install the baseboards perfectly level. This does not necessarily mean that they are flush with the floor, use your level to see if the baseboards are level. You do this to make sure that you can cut all of the battens the same hight!
2. Install the Board and Batten Wall Treatment with Nails, Never Adhesive.
- The previous wall treatment in the room that I put up board and batten wall treatment in had been put up with adhesive and it caused so much damage to the drywall. Nails are enough, find the studs where you can, but if you cannot find a stud just put your nails in at criss crossing angles.
3. Use a board and batten calculator.
- Do not try to do all this math in your head! It is complicated math, the thickness of each batten has to be accounted for. Also, each wall is going to be a slightly different width. If you are doing board and batten wall treatment across an entire room like I am, it is very unlikely that your spacer will be the exact same size across each wall. Using a board and batten calculator will help you figure out how to get it close and trick the eye.
4. Plan around Obstacles.
- You want to try your best to plan around obstacles like vents and outlets. For instance, on one of my walls, I planned out the spacing so that a batten lined up perfectly against my window framing and left space for the outlet. If you cannot plan around obstacles there are different methods to building around them. Some people carry their batten around, but when I had to go around an outlet I just cut the batten with my jigsaw to go around the outlet.
5. Use a Laser Level if you Have One.
- If you have one, use a laser level! This makes the entire project easier, especially on the top board. You want to make sure that the top board is level because it is the most visible to the naked eye.
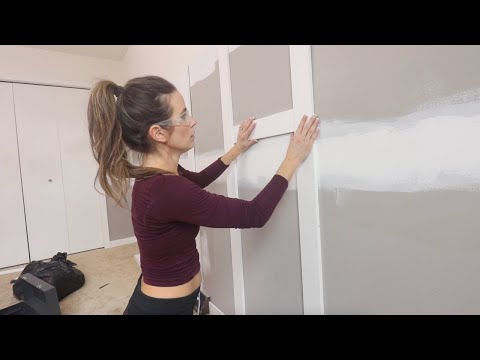
6. Plan Seams Over Battens and Cut Them at an Angle.
- If you must have a seam, make sure it lands over one of the battens and that you cut it at an angle. You want to cut it at an angle so the line is as skinny as possible. Some of my trim was slightly different thicknesses, so I am using a spacer to get everything flush.
7. Use Wood Filler on the Face of the Boards and Caulk in the Corners.
- The face seams of the battens should be filled with wood filler. When the wood filler is dry, sand it down to be totally flush. In the corner seams apply latex caulk. I went through two tubes of caulk in the room I was putting the board and batten wall treatment in. This took me four hours, but is so worth it for the result.
8. Install Backer Rod Behind Any Large Gaps Before Caulking.
- The trim that I added spacers behind had a larger gap, so my tip is to fill that with backer rod before caulking. This will help stabilize and prevent cracking.
9. Paint Using a Mini Roller
- Wall treatments take extra effort to paint. If you are like me and unwilling to tape off the whole room to spray, my best tip is to use a 4-inch mini paint roller. I was able to get all of the seams of this wall treatment without using a paintbrush.
10. Use a Drywall Knife to Paint Baseboards Against Carpet.
- Because I did not use a paintbrush at all in the painting of this board and batten wall treatment, I used a drywall knife to push down and protect the carpet while painting the basebaords.
This board and batten wall treatment was a lot of work, but it was so worth it to DIY. Use my tips and tricks to learn how you can create your own board and batten wall treatment without breaking the bank!
If you liked this interior upgrade DIY and want to see more, my post on how to lay self leveling concrete is a great place to start!
