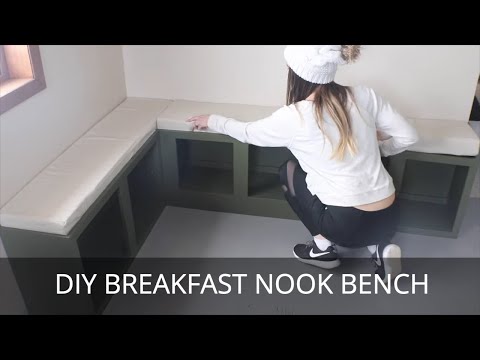
Breakfast Nook Bench DIY Banquette
Next up in the lake house kitchen remodel is a unique up-cycle project I hope inspires you! I had the idea to repurpose some of the short upper cabinets from the kitchen into a breakfast nook bench in this corner of the room.
This post may contain affiliate links or sponsored content. For full disclosures and practices, please visit my policy page.
Table of Contents
- Tearing Down the Cabinets
- Refurbishing the Cabinets
- Constructing the Breakfast Nook Bench
- Creating the Cushions and The Finished Nook
Tearing Down the Kitchen Cabinets
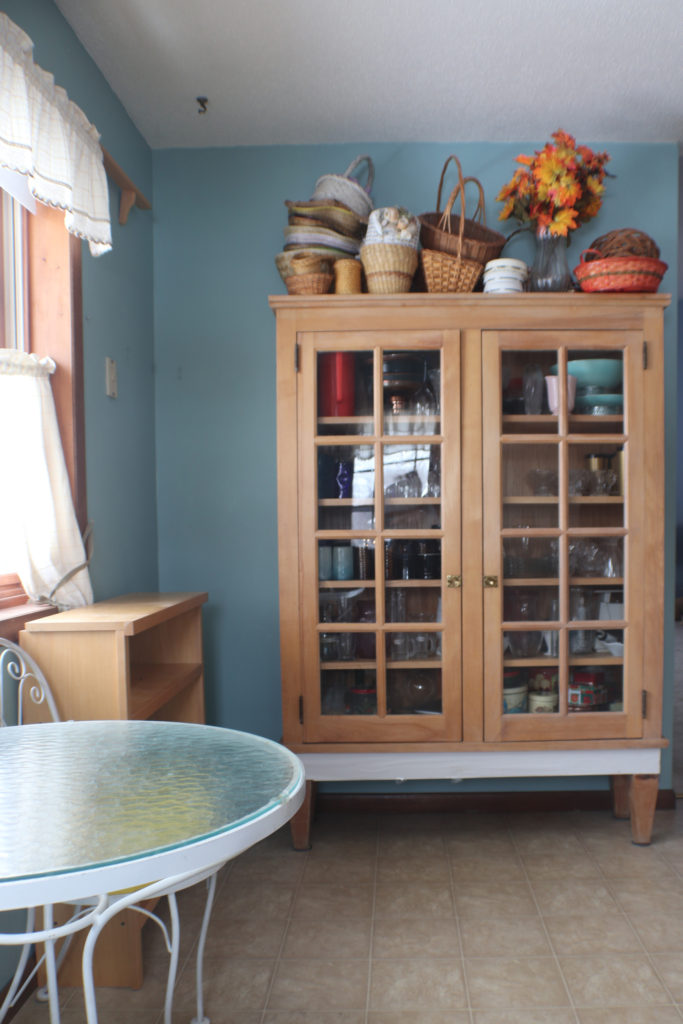
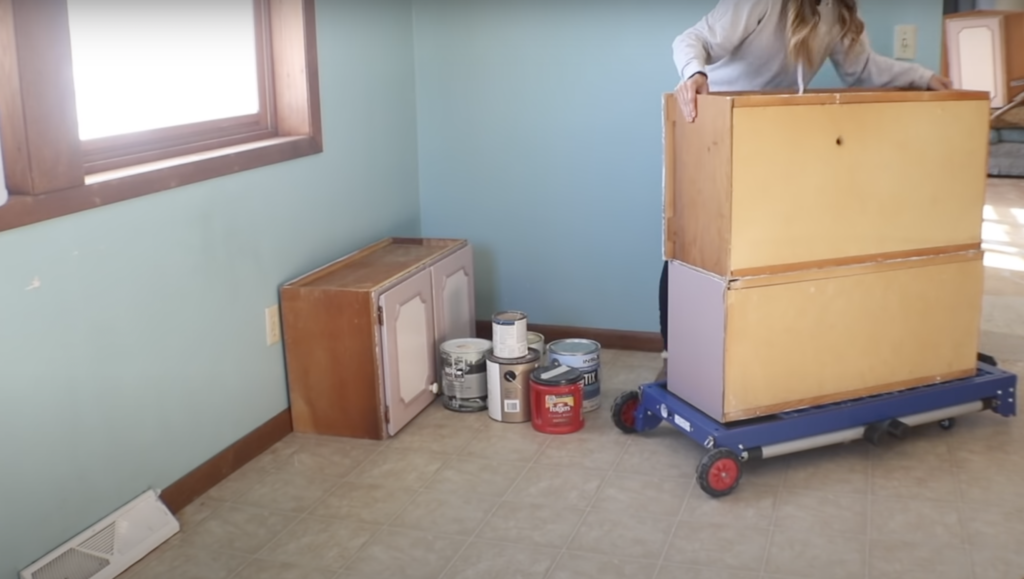
The corner where I am putting this DIY breakfast nook bench currently has a hutch in it, it is kind of a waste of space! I first took down the upper cabinets with my new 5 in 1 WORKPRO workbench. It was a stable scaffolding the perfect height to work on removing upper cabinets more safely. The kitchen cabinets above the sink, the stove, the fridge are the uppers I am going to use to build my bench with.

Refurbishing the Cabinets
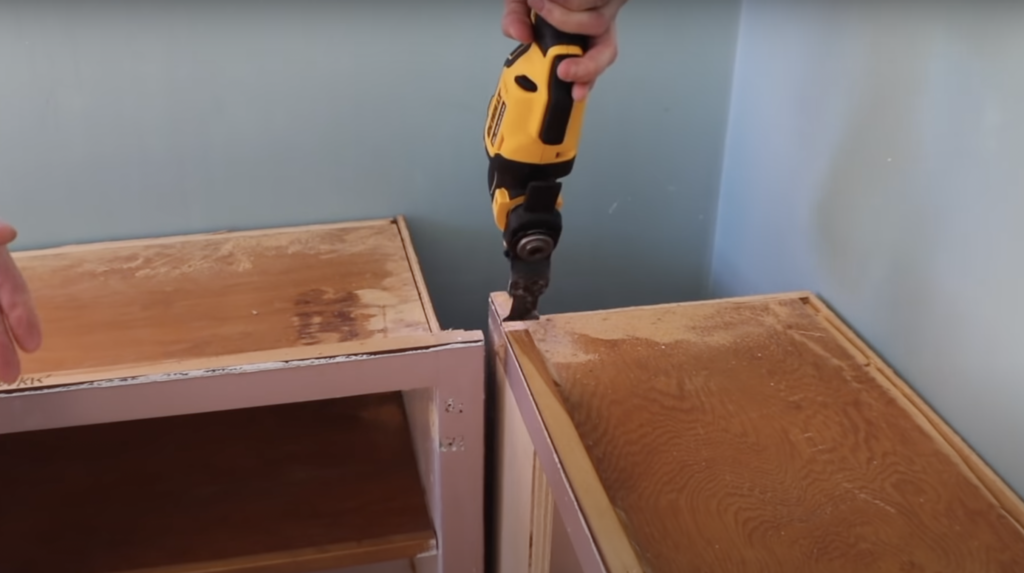
Next, I worked to refurbish the cabinets. I took off all of the hardware and hinges so they were out of the way for refinishing. The detailed trim on the cabinet doors is also getting removed in favor of a more streamlined look. I used my table saw to cut two by fours and attach them to the bottom of one of the cabinets so all three of them would be the same height. Unfortunately two were 18″ tall and the one was only 15″ tall.
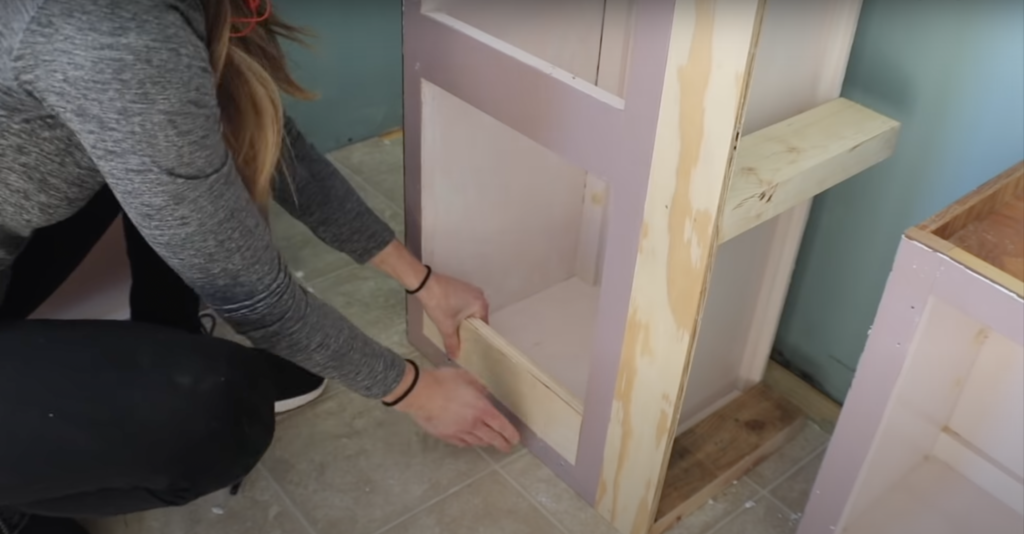
I used wood putty to fix any imperfections or holes in the cabinets from screws or electrical going through. It did a great job of covering up the blemishes. To cut all of the excess trim around each cabinet, I used a multi-tool. I strategically left some on the edges of the bench so it would encase a cushion nicely. The side of one bench is getting plywood as an addition, so it will be flush with the front face on the end. There were a lot of modifications!
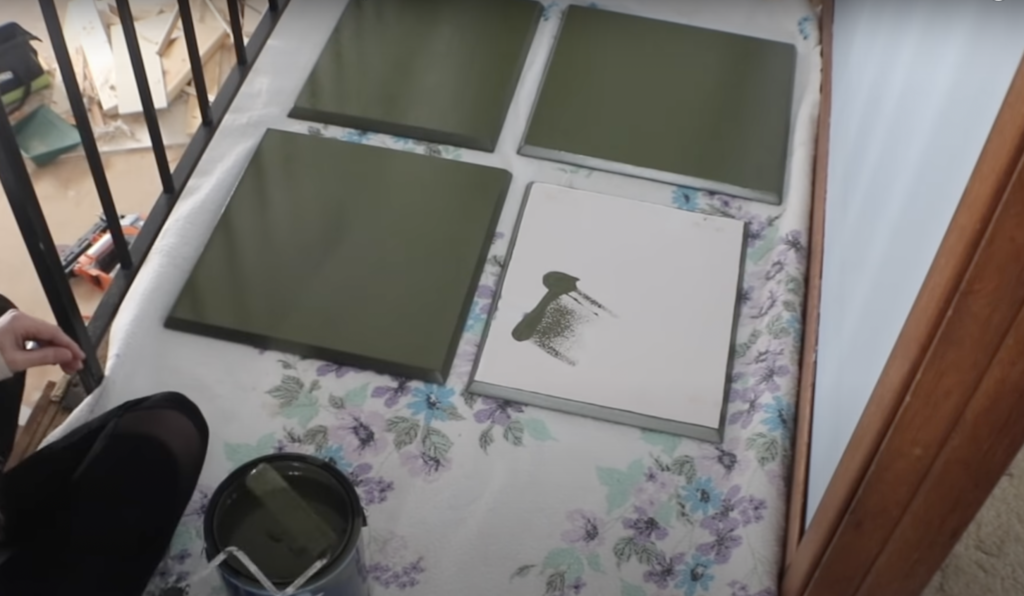
I used a belt sander to get paint off of the cabinets so it would be a smooth finish. The belt sander is the quickest way I’ve found to remove all the old paint. I used it on every cabinet’s front face and door. After the cabinets are sanded and ready to go, I am priming and then painting the cabinets a beautiful dark green color.
Constructing the Breakfast Nook Bench
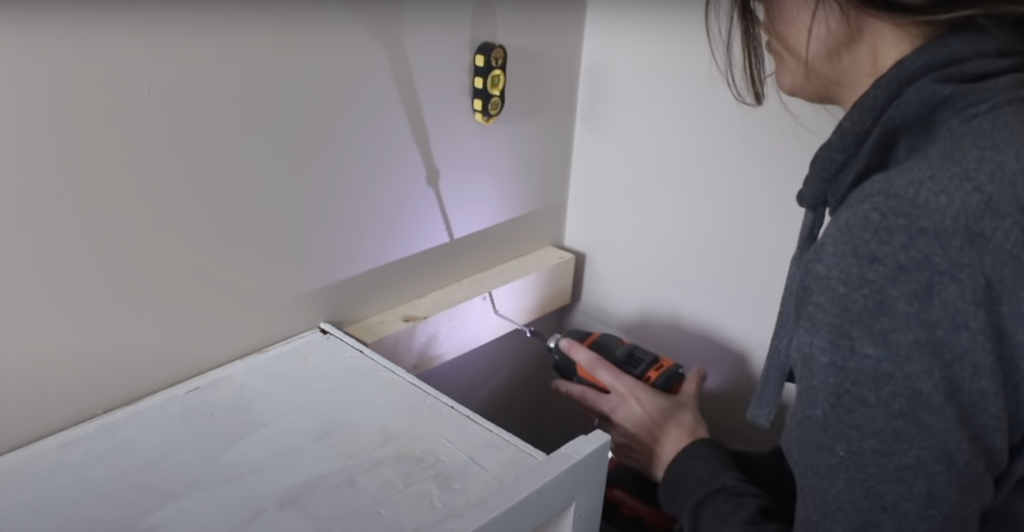
There was is hole in the corner between the cabinets, so I am adding some reinforcement. Using my magnetic stud finder, I found the wall stud and secured 2 x 4’s and put some plywood there.
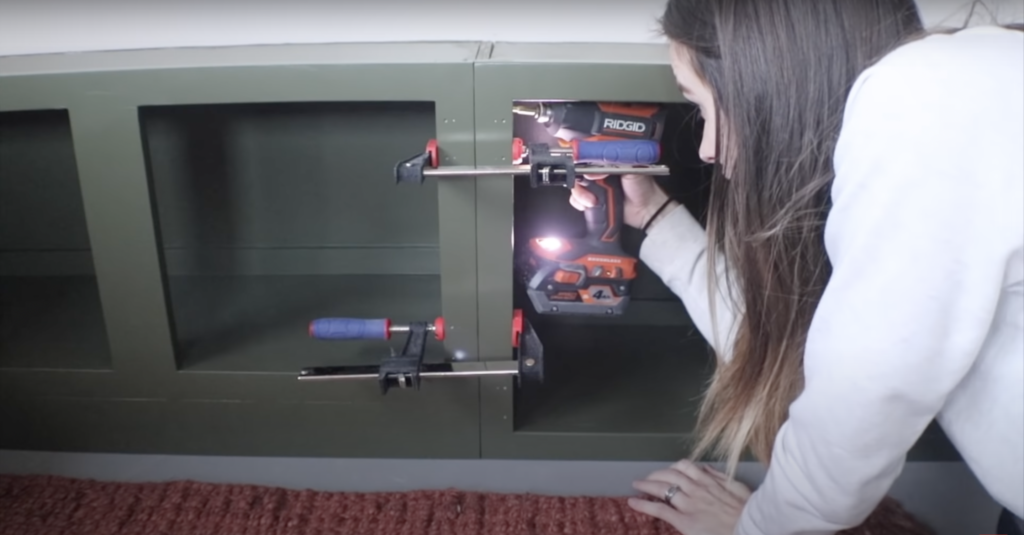
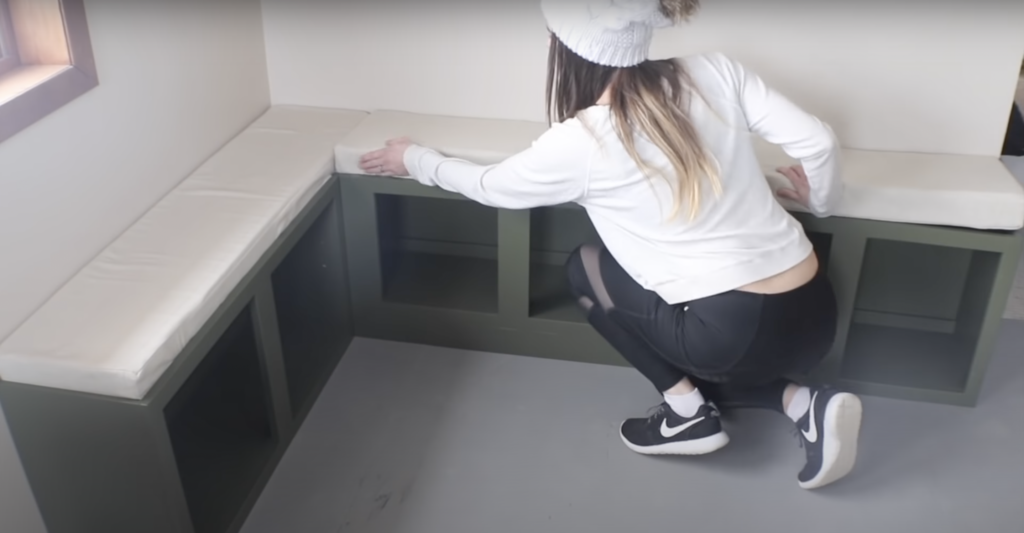
I set all of my cabinets in place and clamped them together so they were tight side by side. I am putting screws on the inside of the cabinets where they are clamped to hold them together.
Once I reattached the cabinet doors, the nook will be done! Now it was time for the finishing touch that makes this breakfast nook bench so cozy – cushions!
Creating the Cushions
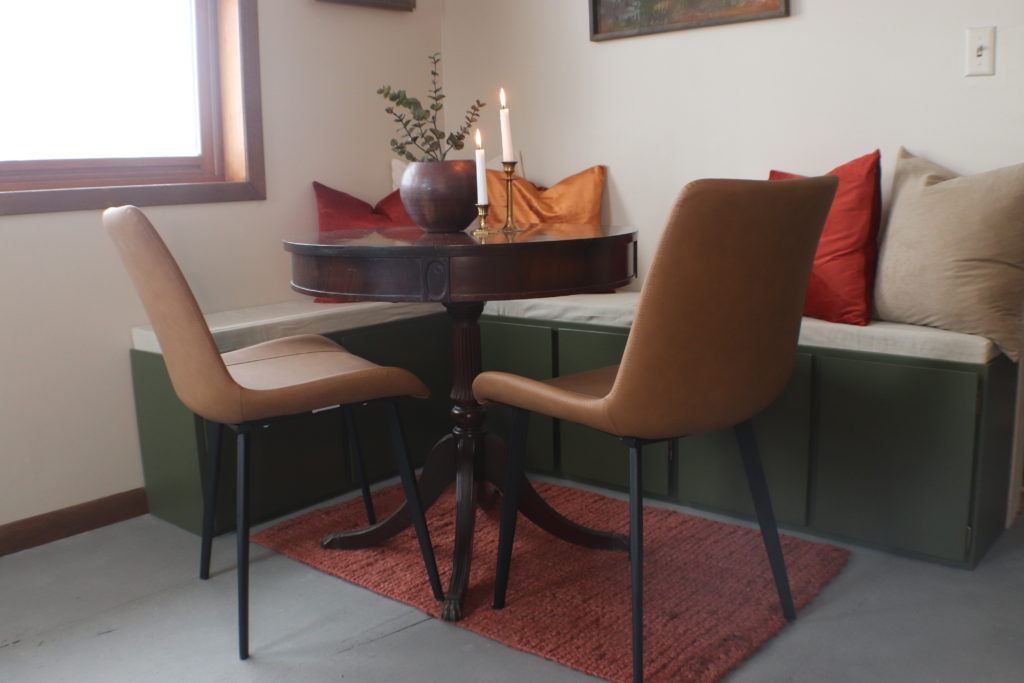
The next step was to make some cushions and I asked my mom for help. I don’t have the best sewing skills. We used an old cotton curtain I had as the fabric and secondhand foam. The cushions only cost me about $80! My mom even sewed in a zipper so we can remove and wash the covers!
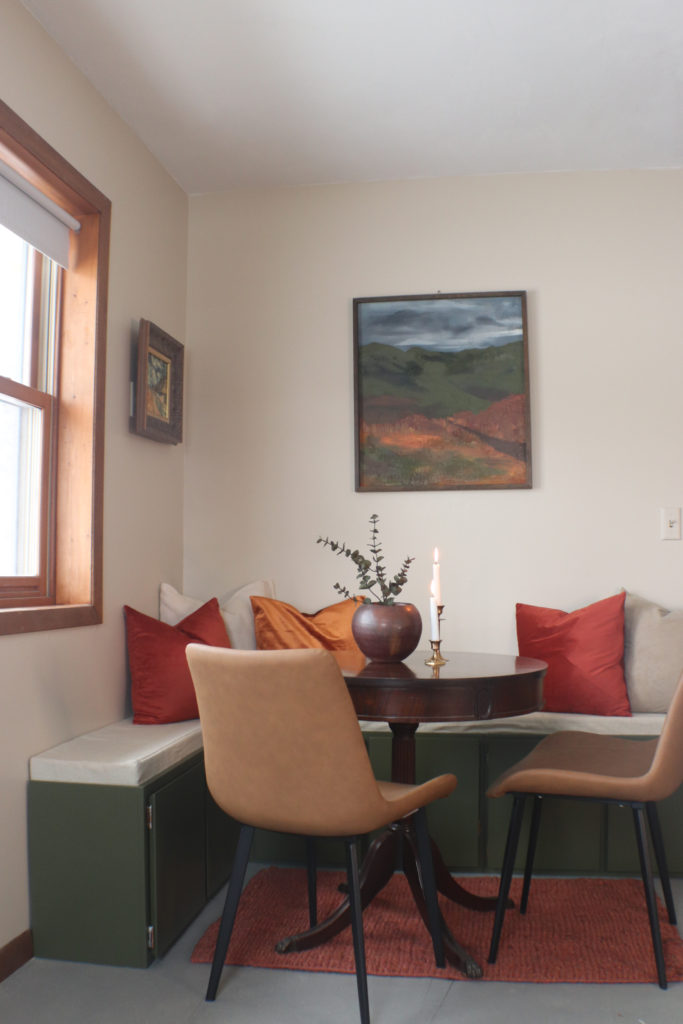
I added a lot of textiles to the design and vibrant colors to compliment the olive green cabinets. Currently I have an antique round table paired with the breakfast nook bench. However, I will probably get something bigger and more to scale in the future.
The colors here are warm and inviting and cozy. I definitely designed outside of my comfort zone of neutrals on this project but I love how it turned out! These colors are going to continue throughout my kitchen.
I hope you were impressed by this project! If you loved it and want to see how the rest of the kitchen turned out, read my DIY small kitchen makeover!