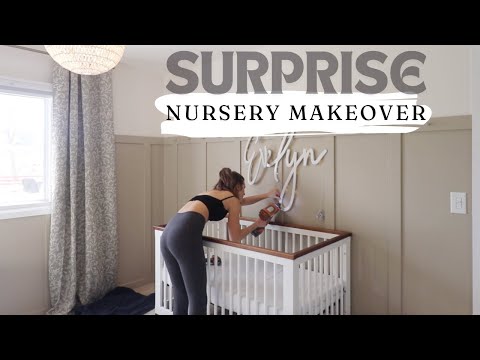
Nursery Makeover
Some of my best friends are expecting their first baby! Dan and Chelsea are my husband and I’s best friends, and they are expecting a baby girl! I could not think of a better gift than to give them the nursery of their dreams! This DIY nursery makeover project is so meaningful and I had so much fun doing it!
This post may contain affiliate links or sponsored content. For full disclosures and practices, please visit my policy page.
Table of Contents
- Preparations
- Day 1: Demo Day
- Day 2: Wall Treatment
- Day 3: Caulking
- Day 4: Painting
- Day 5: Final Touch-ups
- The Final Results!
Preparing for the DIY Nursery Makeover Project
Dan and Chelsea live 80 miles away from us, so I spent 5 hours packing my car with tools and everything I needed to stay with them and complete the work. I’m trying to transform this whole space in only one week, so I did some of the building beforehand.


I start by assembling 1x2s that I cut and primed into a think display shelf for one of the walls. I plan to put picture books on this so that you can see the front covers. To build the back of this display, I am gluing and nailing on 1/2″ plywood. In addition, I am projecting the baby’s name on a piece of 1/2-inch plywood to trace for a name cut-out. I was the only person who knew the baby’s name before she was born, and it was so that I could make this! This part of the project took me 4 hours. I had to carefully cut the thin, loopy text out with my jigsaw and a scrolling blade. I know I could have bought a name cut-out online, but it is impossible to order one as large as I wanted. It also means more that I made it myself! When the cutting was done, I sanded each letter and spray-painted the name.


Day 1: Demolition of the Room
Once I completed all of the prep work at my house, it was down to Dan and Chelsea’s house. The first thing I am doing is demolition. I ran into a problem almost immediately, the person who installed the chair rail had used construction adhesive. This means that removing the trim work ripped the wall’s paper, and I am going to have lots of annoying drywall repairs to complete. I recommend never using glue; nails are enough! I am also scraping the popcorn ceiling texture off, so I am removing the light fixture and covering the carpet with plastic. Scraping a textured ceiling is quite easy and very satisfying. This one has never been painted, so it scraped off without any issues.


After cleaning up the mess from scraping the ceiling, I have to wipe down the ceiling and walls because there is so much dust. Once they are clean, I will roll primer on the exposed raw drywall on the ceiling. If I did not prime the wall, the primer would not adhere and I might have issues. While I am waiting for my primer to dry, I am applying the first coat of all-purpose joint compound to the damaged part of my drywall. To finish off day one, I am rolling a coat of white paint on the ceiling and upper third of the wall and applying a second coat of joint compound.

Day 2: Board and Batten Wall Treatment
I am starting day two with sanding the joint compound; it dried overnight. Once it is sanded, I am priming over it to prevent flashing. My big project for day three is the board and batten wall treatment. Chelsea and I had looked at lots of Pinterest inspiration when planning this design together, and she loved the modern style of board and batten. I am doing a faux treatment where the battens are just nailed on the wall, no boards required. A lot of the inspirational photos we looked at have this wall treatment as one wall behind the crib, but I am going big and doing the WHOLE ROOM! If you want a more in-depth tutorial on how I did this wall treatment, there is a blog post here! Installing this wall treatment took most of day two, but it was so worth it. The last thing I am doing for day two is smearing wood filled in my face seams so it will dry overnight.


Day 3: Caulking
I am sanding the wood filler and beginning to caulk on day three. My goal for day three was to get paint on the wall treatment, but that did not happen. Caulking took SO long! Three hours and two and a half tubes of caulk later, I finished caulking. I was not happy about this. I ran out of caulk and had to go to Home Depot to get more; this set me back for day three. The only other thing I got done was installing the new light fixture. I love this woven fixture; it casts a beautiful shadow on the ceiling!


Day 4: Painting
I spent all of day four painting. The color that I am putting on the wall is very calming and is called Pigeon Gray by Dunn-Edwards. I love that it is neutral enough to transition with this room into whatever it might become. It does not scream nursery.

Day 5: Insalls and Final Touch-Ups
Day five was all about adding the final details to the room! I patched some imperfections that showed through the first coat of paint. Then, I am sanding, priming, and painting over the patches. I am adding cute peg hooks to the top rail of the board and the batten design. Then, I am rolling a coat of fresh white paint on the entry door, window trim, and closet doors. I am also swapping out the closet door knobs for cuter ones. My go-to curtain rod is also being hung up; I am hanging heavy blackout curtains on this. They are a pretty sage color. Dan helped me tape fairy lights to the name cut-out so it would be backlit. I am adding a couple of little blocks of wood that are the same thickness as the battens to support the name hovering off the wall. To attach the name, I am using short brad nails. Now that all the final details are added, it is time to surprise Chelsea!


Final Result of the DIY Nursery Makeover Project
Creating this room was truly a labor of love. I love using my growing skillset to show appreciation and support for the ones in my life that mean the most. Chelsea is so glad to have this calming, comfortable, and curated space to bring her first baby home to. Every inch of this room was touched, from the ceiling to the floor. I am so pleased with how everything turned out! I hope you loved this DIY nursery makeover project and that it inspired you to give your home improvement talents to those you love.


