How to Build Non-Load-Bearing Interior Wall
My house has an open space at the top of the stairs that is currently being used as my husbands office. I think a different space would work better and offer more privacy, so I am going to build a non-load-bearing interior wall to create a room for my son.
This post may contain affiliate links or sponsored content. For full disclosures and practices, please visit my policy page.
Table of Contents
Prep Work for Building a Non-Load-Bearing Interior Wall
To begin this project I have to clear out this entire space which means rehoming many different things. Once that is complete I am bringing up the drywall before I start framing. I do not want to maneuver through the skinny hallway I will create. I am starting this project by cutting into the bulkhead. When I cut into the bulkhead I found a long white wire that I needed to be cautious of. Once I have cut open the bulkhead I am working on the flooring.


Flooring for the New Wall
To build a non-load-bearing interior wall I have to cut up some of my carpet, to install the wall. I am laying down a 2×4 to use as my guide for the width of the wall and cutting out the carpet and padding beneath it. I am also cutting off the piece of baseboard and tack strips that is where the new wall will be.


Framing the Non-Load-Bearing Interior Wall
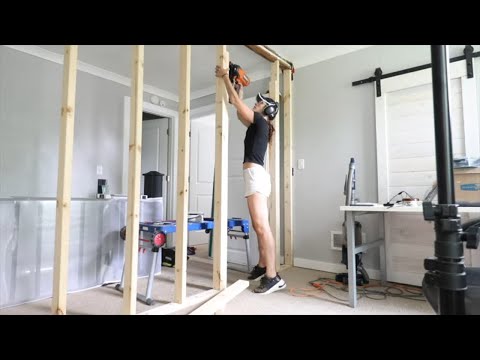
I am using 2x4s for my framing. I am going to assemble them on the bottom plate using my framing nailer and studmaster. There is no top plate in my framing because I am trying to work around the wire that I found when I cut open the bulkhead. I drilled a hole at the top of each of the studs, so the wire could go through the center. In addition, I drilled pocket holes to screw the studs into the existing 2×4 in the ceiling and use that as a top plate. I was not sure how this would work without a top plate and the answer is not well. As soon as we went to lift up the framing the ones we were not holding on to came out of the bottom plate. I ended up toenailing the 2x4s that came out.


While I was screwing the 2x4s into place and stringing the white wire through the holes in the top of the studs, I tugged a little bit too hard on the wire and it popped out. It was not attached to anything! After doing all that work to accommodate for this wire I can pull the white wire out. After the studs were all secured on the top, I am able to go through and secure them to the subfloor. This is done by nailing them down through the bottom plate. This is when I toenailed the bottom of the studs that had come apart while lifting the wall. Next, I framed the door.


Mounting Drywall
I put up a few full sheets of drywall while I had my husband’s help. I had to do the top sheets of drywall first because I only had his help for 30 minutes! After the top sheets were hung I had to lift the bottom sheet by myself. After hanging the sheets of drywall comes a lifetime of mudding and taping. This process always takes a long time. When I was done taping and mudding I came in with my random orbital sander to sand. Overall, I was extremely pleased with how my drywall job turned out.


Finishing Touches
Once my wall is sanded it is time to paint! I began by priming the walls and then went in with my paint. I am so excited, I built a functioning wall! The ceiling fan also needed to be uninstalled because I am getting a new light fixture for the room. Then, I installed the door, I bought a door that matches the rest of the doors in the upstairs of our house. I finished up the door space with trim work and caulking. Now that my wall is built I can move on to decorating this brand-new room! This room already had everything needed to be a bedroom like hvac, a closet, windows, and plenty of electrical outlets. If I were to do this project again I would’ve run electrical through the wall I built to meet local building code.


If you liked this interior upgrade DIY and want to see more projects like this, my post on how to lay self leveling concrete is a great place to start!
